Author Archives: HHaricot

Making my Kentwell clothing 3 – simple shift for youngest daughter

Just reminding that for costume making I will be following the tudor costume page fairly slavishly and begging advice from k at deependers on materials suitability and nearer the time costume elves [!] for the difficult bits [ie kirtle bodice ] I am currently not a re-enactor, but have visited Kentwell [see preamble] and we are really keen as a family to join the tudors. I plan to make a shift and petticoat for each of us girls, a shift for DH by Xmas. This is also a good site to read up on what to do. Other people I know have found the mediaeval tailors assistant to be really helpful for shifts, or the tudor tailor.

This means that the steps detailed here are not originating from my brain, but the tudor costume makers, though some of the mistakes and how to avoid unfortunately did :blush: .

NB Anyone thinking of making clothes for re-enactment, please check with your group the ‘rules’ on materials, colours and look. different tudor years have different styles – tho less so for poor, especially poor kids. following these notes does not guarentee acceptance of clothing by Kentwell or any other group, but may help a total novice such as myself. I had never made any clothes before these – a hint of my novicitude. Also, with shifts there are a variety of neck finishes – square, simple or collared and cuffed – potentially with ruffles. You might need to know which youa re expected to do. otherwise, you could go as far as making the neckline bit and then wait until you do know. I wrote this initially in Sept 2011, but have added in the things that had I had known I would have done differently – mostly in italics :) . however, the clothing was passed for Kentwel 1556 . i have also been told that a run and fell or a french seam would be stronger for shift seams, but is a bit beyond me, and the seams of my shifts did hold :)

First shift – BB’s child’s shift

Materials and Measuring

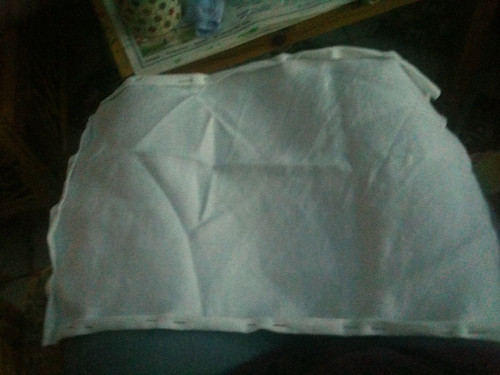
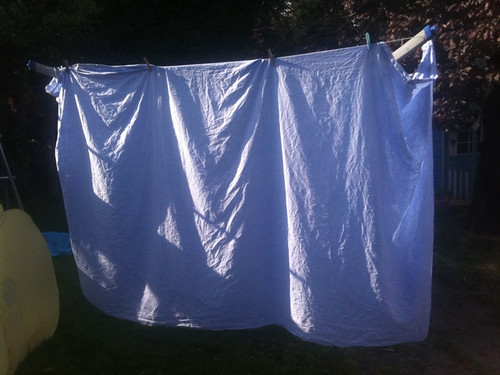
I am using a 100% irish linen in white rather than unbleached. This is what i could find that was 100% linen in the affordable range. Apparently unbleached goes whiter and whiter with use. These are going to be therefore much used shifts :) it has been hot washed 2ce and dried, so shouldn’t be more shrinkage [I hope!] It is not at all bluey in real life, even if it does looks so on photos. Hot washing does shrink the weave and tightens it. Ivory white for lower classes or natural is probably better than whitey white.

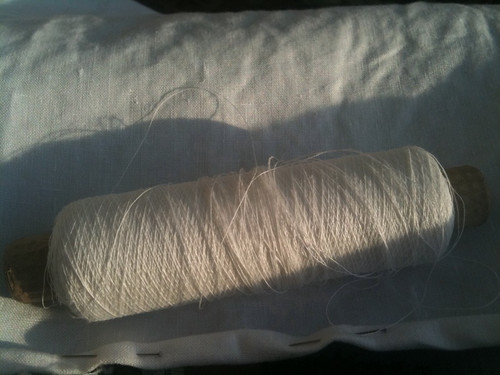
having been to a reenactment recently, I picked up some linen thread, a white 2 ply and an unbleached 3ply. I am using the 2 ply for hemming and the 3ply for whipstitching.

I measured up using the Tudor costume page to BB’s mid shin – 30″ and around her chest and made it looser to 24″ so overall as a rectangle i wanted 60″ plus hem margins [seem to be an inch per hem when i do them] by 12 inches plus hem margins. SInce the material was 60″ wide I decided to forgoe the extra inch in length… each arm was measured from shoulder to wrist with 2 inches added for seams, and around to look loosish to give me my 2 arm rectangles of 16 by 12. I have also cut out 2 6″ squares to be underarm gores [more later]!

[edited to add, I should have given more width to my rectangle!so next time I will be definately going looser!]

Hemming and Pinning

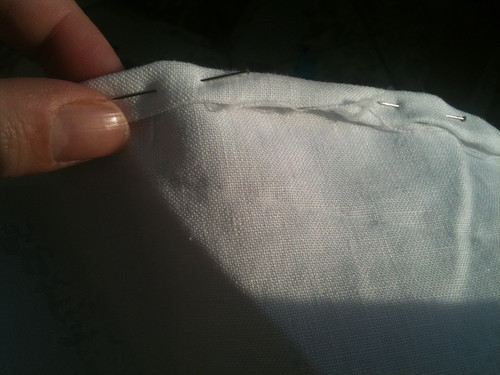
I hemmed the body rectangle along its 2 long edges having pinned first [I am getting better at straight edges, but variable still at remembering the seam allowance! luckilly not too short, and so just had to make sure they weren’t too generous!

Then I hemmed each arm on the 2 long lengths and 1 short length [ie 3 sides] Mys children were crafting with me at the same time in the conservatory, which made it very enjoyable.

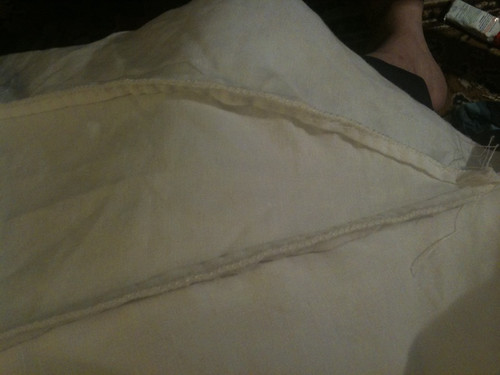
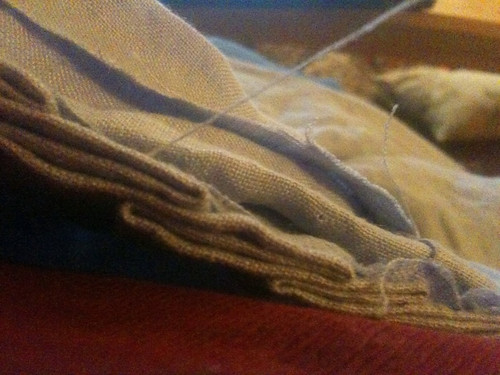
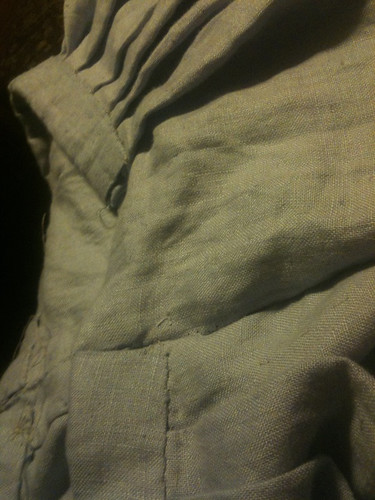
first shift! DD2

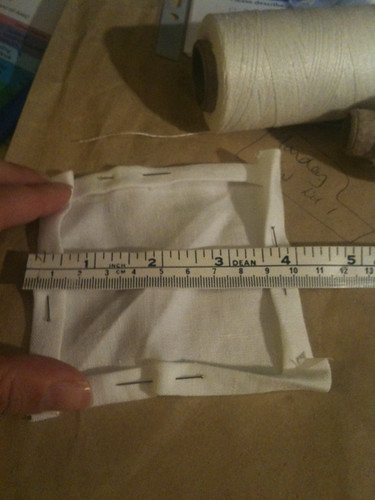
I then put 3 tucks on each sleeve as the sleeves are quite wide, and I was concerned the armhole might be enormous, especially with the square gore. [it still looks enormous, but not finished yet, so will see!]

Next time I am going to pin these so that instead of going in the same direction on my lap, the knife pleats are facing front or back on both arms, rather than one arm facing front, and the other back. I have decided this is too small a deal to unpick!

I then placed a pin at the midpoint of each longside of the body piece, and the midpoint of the hemmed short side for each arm, and lined these up.

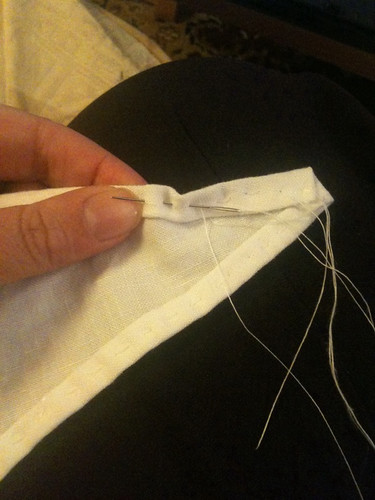
i pinned them right side to right side, with the midpoint pins lining up so that each arm was securely on, and checked that the arms weren’g going to be sewn in the wrong way round, as this is apparently a very easy and common thing to do. [and i am good at making mistakes!] . i then whipstitched the arms onto the body.

Underarm gores

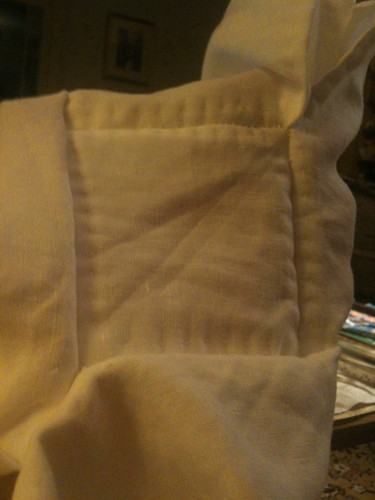
I have cut these out at 6″ as recommended for adults, but my hemming means that they are 4 ” square for sewing in.

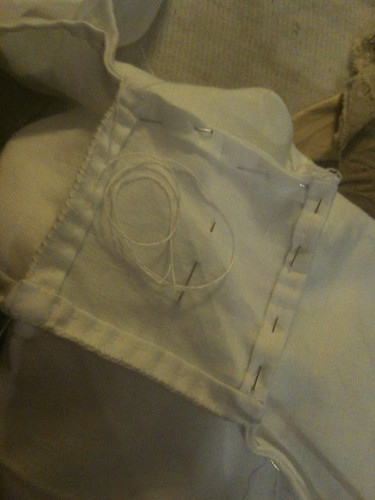
I then used these squares to make a diamon shape under the armpit with the bottom 2 sides of the diamond being sewn to the sides of the body, and the top 2 sides of the diamond sewn to the underarm seam of the arms. Makes a lot more sense with photos!


And that is as far as i have got currently. It does seem a bit odd to have no head hole yet mind you…

side gores

Aha!! we have moved on :) I added hole so that BB could try on, following the steps in the tudor costume, making it 6″ transverse and 4″ vertical in the end to get over her big head :) I identified the midpoint with a pin, and checked a few times that i had the right horizantal space too.

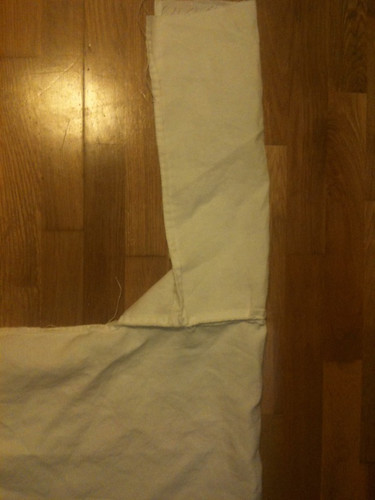
When i did this, i realised i hadn’t corrected either for a slight pot on tummy! so it is tight!! i therefore decided that my triangle side gores would need to start just under armpit square gores, and get wide quite quickly to allow ease of putting on and taking off. A nuisance, as i think for a young childs shift i might have got away with splits from thigh, splits from underarm prob not!! SO I cut out 2 triangle gores of length of underarm to hem at bottom, with a width of 11 ” these i whipstitched in between the side seams [obviously getting wider going down] and didn’t seam the bottom 3-4″ and left those as splits, as a young active child likes lots of skipping and running room. If necessary, i can sew it up down to the bottom if it is more authentic. I also hemmed along the bottom. It comes out as just below knees


neckline

i then carefully hemmed a collar shape around the neck area along the line of design 2 with a narrow collar. I haven’t added the collar and tie as saw children with v plain necklines, and I know BB would prefer this less fussy approach. If necessary It won’t take long to add collar and tie.

I then tacked the sleeves to where I think they should be now with a big hem tack, and then will do properly nearer the time incase arms have grown a lot longer.

SO I am calling this done for now, tho it still needs finishing touches. BB plans to wear it as a nightie for a bit to soften it down and get comfortable.

What I have learnt? to be much more generous with loose allowance next time.

having been to kentwell i have also learnt something else – you need to have the wrist loose enough to push up the arms [mine were] and ideally you want a smaller horizantal slit across the neck even if you need a larger slit down the front, as it is the back of the neck and the shoulders where your children will burn.

Making my Kentwell Clothing 2: – petticoat for me / petticoate-bodies

Kentwell costuming – The Petticoate – Adult version

Just remind that for costume making I will be following the tudor costume page fairly slavishly the tudor tailor book and nearer the time costume elves [!] for the difficult bits I am currently not a re-enactor, but have visited Kentwell [see preamble] and we are really keen as a family to join the tudors. I plan to make a shift and petticoat for each of us girls, a shift for DH by Xmas, and 2 shifts each before the first open day in feb [ie majority of linens, at my own risk as may well not be accepted] this is because there is a huge amount of sewing to be done, and i think if you are any more than 2, to try and fit it all in after acceptance is really a tall order and hard work.

This means that the steps detailed here are not originating from my brain, but the tudor costume makers, though some of the mistakes and how to avoid unfortunately did :blush: . The tudor costume page has unfortunately got some non-working links, and since it was last updated a fair while ago there are a few non-completed bits. This wasn’t a problem for petticoates though. Nothing detailed here seems particularly at odds with costume notes from a prev year.

Anyone thinking of making clothes for re-enactment, please check with your group the ‘rules’ on materials, colours and look. different tudor years have different styles – tho less so for poor, especially poor kids. following these notes does not guarentee acceptance of clothing by Kentwell or any other group, but may help a total novice such as myself. I had never made any clothes before these – a hint of my novicitude. I wrote this initially in Oct 2011, but have added in the things that had I had known I would have done differently – mostly in italics :)

See first the Petticoate – Children’s version, as I am building on that knowledge to do this one.

* ah, well here is a thing, i made this beautiful petticoat just like this, went to get help for my kirtle, and instead [or as well] ended up cutting this up and attaching it to a boned bodice. this is a remarkably good think for a more buxom figure. there is debate over boned bodice for the poorer such as myself, but it has huge advantages in support and then simplifying the making of my kirtle. sooo… read this and it will describe my lovely petticoat, and then the boned bodice version [well reeds actually] and then make a decision as to which you may assay to make and start at that point. NB my previous comment on the kids petticoat about nomenclature, coloured or otherwise linen and red wool]*

The Material

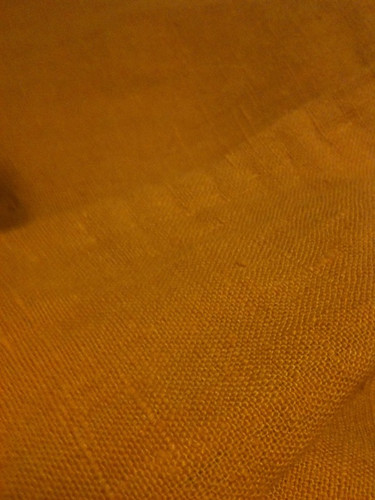
I am using a mustard/turmeric coloured 100% Linen mediumweight. I have washed it and hung it. It doesn’t seem to have shrunk much either. It is more scratchy than the linen shirting, but allegedly it will soften up with use. Having made the whole thing, this material size of 2.9 x 1.5 will easily make any adult size as it has succesfully made a plus size. in fact, 2.5m would be enough if you don’t need side plackets or are smaller and still want them and make it more like the childs one, but would like it reasonably pleated and thus good leg mvt. *actually, 2m would be enough for the skirt even plus size, as it doesn’t have to be so pleated. the pleats are so you can do a good stride, 2m is enough to stride :) this could be made as a single rectangle, or piece fabric up to that as linen often in 150cm width*

Measuring Up

this time my material length is only 2.9m by 1.5 . i thought i would go for a x3 mark up on my waist, but my waist is not tiny. another thing is that i am hoping to reduce its dimensions between now and kentwell. so, humming and hawing, i have decided to make the waistband potentially 2 inches each half less than i am [by 4 inches in total] and have a placket each side of 4-6 inches [so 8-12 expansion] and mock pin it and see what that seems like, or whether to reduce the placket bit.I am aiming to make this a size 22-26+ is as this, unfortunately is my size variation. Though if i ever get less than 22 i can celebrate with a new petticoat :)

cutting and hemming the rectangles

so today i have cut the 2 main panels at the full material width of 150 being the waist and the length of 120cm. Then from the remaining material I have cut the 2 placket inserts of 20cm by 120cm – I will deal with these later :) . This time, perhaps due to less material and it being stiffer, my lines are far straighter and neater, and as expected it has made the whole process easier. Being on my second skirt also easier as I didn’t need to reference back to the tudor costume page. I just hemmed the sides this time, rather than mistakenly the whole lot!! I will hem the bottom at the very end of the dressing process when I have made a kirtle and have an understanding of what length to go to and then update this post! Because it has such a nice selvedge at the sides, I only turned over rather than a proper hemming – again giving me more material.
Preparing the Waistband

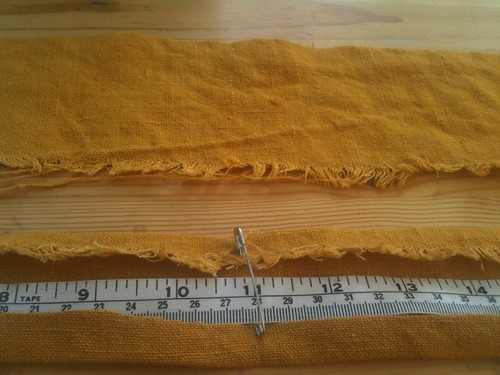
I think I was overconfident here, being so happy with my rectangles and plackets. I had decided that I would like a wider waistband than the child one I had made, so ‘cut three inches instead of two’ for the depth, this was entirely wrong!! I had cut 4 for the childs one, which gave an inch waistband, so should have cut 5 to give 1.5 [or 6 if planning to double the material fully] argh!!!! ANyway, I made it 24 inches long [i am sorry i swap between inches and cm all the time] . preparing the turnovers. I did this 2ce, one for front and one for back before realising the mistake. If I had a lot of material i would have recut. However, I know material is going to be tight, so I have stuck with it.

SO doing the folds, I only turned over the edges 1/2 and inch rather than the full to the middle inch, and the ends did fold in an inch, giving me 22 inches by 2 inches, which will leave me with an inch waistband depth again. I hope the linen isn’t too unravelly! Like before I found the middle and marked it, decided to start my knife pleats 3 inches either side and then have the pleats 1 inch apart, so marked these also. I did this twice. Luckilly I realised this in the next step, because of course the back doesn’t want a 6″ smooth bit across the back, and so when I do this again, I will mark at inch steps all across the back band :) . I also realised this skirt would be way too big for if I shrunk, so took the waistband down to 20 inches front and back!
Pinning the Pleats

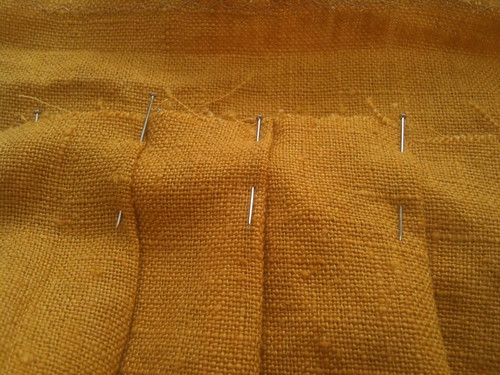
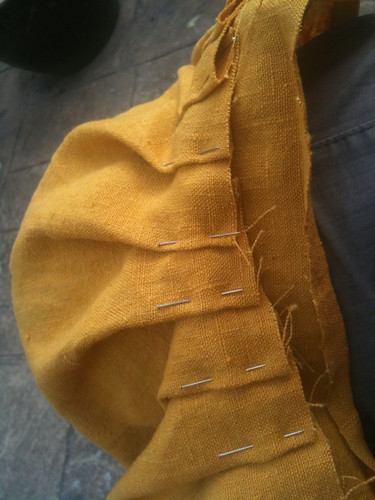
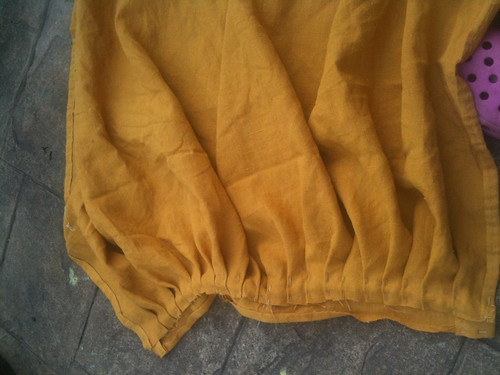
I have decided that I enjoy pinning :) It might be my favourite bit. Making sure that the pleats are crisp and even :) . Having done the front, I turned to the other waistband and narrowly avoided my other mistake. SO I had 3 inches smooth either side and then knife pleats going away from the centre that went forward 1 inch for the first, back 3/4 inch and then forward 1.75 inches and did a tiny bit of adjustment for the last few pleats. For the back I pleated towards the side [away from the middle] and went forward an inch for the first, back for 1/2 inch and forward 1.5 with some adjustment towards the end. I then looked at them both, and although I liked the look of the front, I didn’t like the look of the back. SO I took out the 1st pleat from the middle on each side and turned them, so I have a box pleat to start with. I think this looks a lot better.

edited to add: it is clear that if you want to box pleat a separate placket in, the seam should not be inline with the waistband, but a centimeter beyond this to give the best appearance. ie if you are adding a separate placket, make your main bit protrude beyond the waistband by a centimeter! Even if you are using no extra material as a placket, but having one side protrude beyond before sewing to the other panel, i suggest the seam is a centimetre beyond the waistband

Sewing the skirt to the waistband

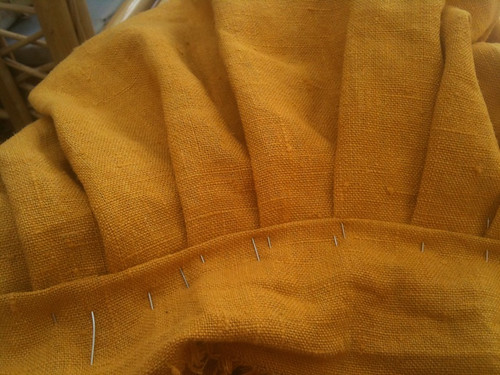
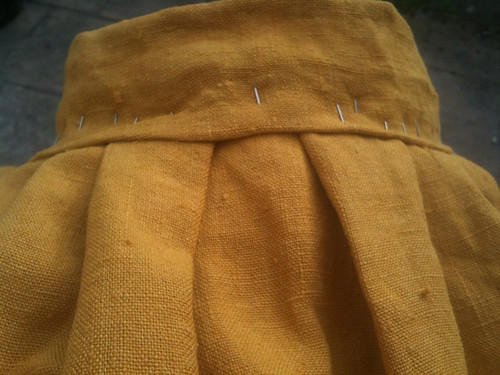
This is nice and easy. i have hemmed the waistband onto the pleats on the outside as I think the tudor costume page suggests, and then decided just to hem the other side might be a bit weak, so after hemming the good side, on turning back over I did a running stitch between the pleats and the fold up of the waistband, so invisible from the outside, but hopefully a bit of extra strength. I removed all the pins – this time I had made sure all the heads of the pins were uppermost.

This time on folding over I have only pinned the inside view waistband to pleats. This is partly because if there is any material spare, I may consider adding a ribbon along if I can be bothered! But it is also so that if i do box pleat in the placket, it can be done under the waistband and much much neater :) I do like how the pleats are looking.

The Placket

If anything, this might be the controversial bit of building this costume. But it does seem a very sensible design to allow some flexibility of the waistband size. I am not a tudor costumier, or even amateur researcher. I am just someone trying to make something sensible, comfortable and with a bit of give to it, considering I tend to not fix on a constant size. It seems likely that I will want to use the clothes for more than one year, and no doubt due to the close fitting nature of the kirtle some unpicking and readjusting may need to happen each year. I would like to minimise the bother tho
[ and in fact, in my head I am trying to adapt the kirtle skirt bit too if possible so the adjustment would be to bodice/stitching the 2 bits together]

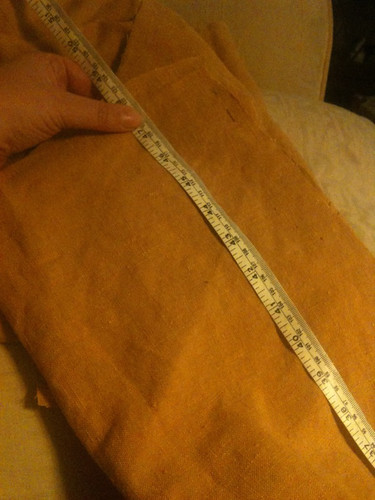
I digress. I have these 2 bits of 20cm [8 inches] by 120cm and will hem sides and top to take it to 6 inches by 120cm. of these, and then intend to whipstitch them to the front and back to make a side panel on each side, and then consider a small pleat under the waistband on each side, giving it a box pleat appearance and 4 inches of extension from the placket on each side. This should enable it to be easy to get on and off and a varying waist size from 40-48 inch, so a 22 – 26 dress size.

However,if i was thinner, or had material that could have been cut so that I could have constructed the placket bits like in the childs version, this would be far easier!! 2 more bits of material = lots and lots more hand hemming! *in fact I could have done – 1 x 200 or 2 rectangles of 100cm is all I needed*
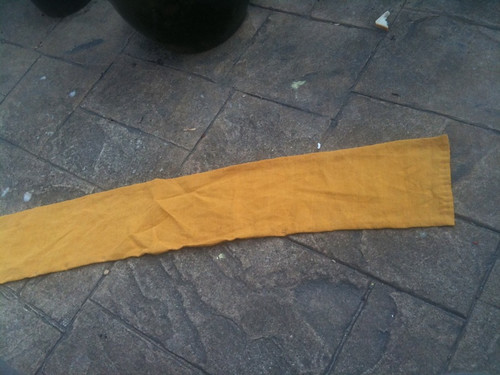
Whipstitching the sides

*edited to add: it is clear that if you want to box pleat a separate placket in, the seam should not be inline with the waistband, but a centimeter beyond this to give the best appearance. ie if you are adding a separate placket, make your main bit protrude beyond the waistband by a centimeter! Even if you are using no extra material as a placket, but having one side protrude beyond before sewing to the other panel, i suggest the seam is a centimetre beyond the waistband I didn’t do this, but even better, don’t have a separate bit of material, have 1 rectangle of 2 m [or 2 rectangles of 1m each or a 150cm and a 50cm ]*

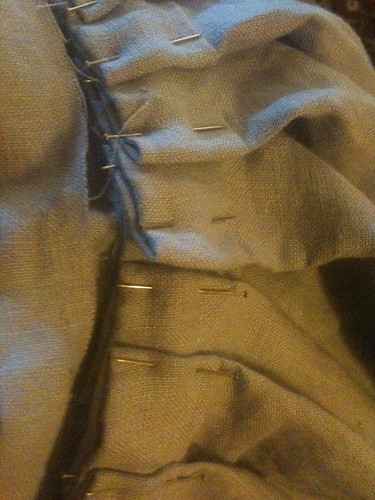
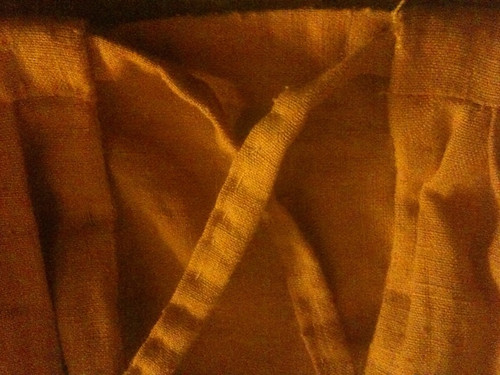
i have put this higher up in case someone is actually reading this as instructions, so you don’t come to this and have a ‘doh!’ moment like I have. I think the box pleating it looks nicer – and i have made that calculation for the material! But am going to discuss with friends who actually know something about sewing before doing it, as the whipstitched seam doesn’t look so good, or sit so nicely bent back like that. [grr to the possibility i might break a cardinal rule and unpick!] for those that might comment whilst i am deciding, i will put pics here. Box pleating it also takes the placket down to 3 inches each side as well… I have tried it on, v gently over pins and it is still loose enough to have some room to grow, tho i hope to shrink!! And, i can get it on, more importantly :)

Making the linen ties

I have the smallest bit of material left! I have enough to make 4 linen ties of 2 inches wide and 19 inches long. These I will fold as per waistband, so the edges are folded into the middle and then the whole thing in half so raw edges buried, and then tack along.

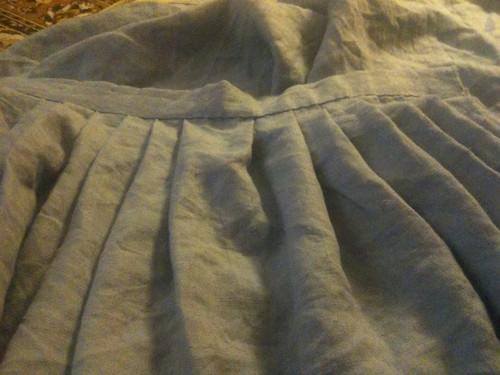
I did make it box pleated, as looks overcomes everything else :) and have pins along the seams to hold them neatly in the box, and may iron… you can see both box pleated placket and linen ties
Petticoate-Bodies

And that is how it was planned to end, but… I sought help over making my kirtle, worried about the boning etc, and was advised that actually i should have a petticoate bodies instead. this would support me well, and make the kirtle bit easier. These were def worn by the rich in elizabethan times, not so much evidence for the poor, however then the poor didn’t really get much opportunity to become plus size, and i didn’t want to look ridiculous nor feel uncomfortable, so happy to go with the advice. *This may not be appropriate for you/your reenactment group etc*

If I had planned this from the start though, I would definately have used red lighterweight wool for the skirt part. Instead, I unpicked my petticoat – and all those lovely pleats :sob: and cut 2x2m rectangles x my waist to ankle, rehemmed it 2 short sides only. Homestly, you could do this as a single rectangle of 2m. Then my fab helper started me off on the reeded bodice part. looking at all the sewing ahead, i decided this was indeed the moment for a sewing machine.

Making a toile

firstly, you need to make a toile. Now this is the pattern of the material in a non fraying cheap material – polyester etc. she made this, I have no pics, by putting her bodice on me, cinching it to where it needed to go, then draping all the material over me, cutting out the shape that would suit me and redraping and refining. This turned out to be a front half and a back half. the sides were left so there would be a 2 inch gap between front and back half of material which will be laced together. If you are a novice, you MUST HAVE HELP here. If you are Kentwelling, you either visit an ‘elf’ who will help you make one of these, or you opt for the petticoate above and go to a kentwell costume day or local elf to make a toile for the kirtle bodice and boning. There is an art to toile making. It is relatively straightforward in the bustless, and where you are following the body, but where you are aiming to control the body, it needs someone who knows what they are doing to get the best result.

When you have your toile, then cut it out in canvas x 2 or heavy linen x 2 if you are planning to handsew the channels so it can be seen, or in both canvas x 2 as the hidden inner bit and linen x 2 which shall be your outer showing bit – ideally in natural or muted linen. when you cut you do need to add seam allowance – which is about 1cn all the way round. note that it is best to pin the toile to the fabric on the flat, chalk out the outline for future sewing reference and then cut out on the flat. [i do have pics of doing easier toiles for example the pourpoint later on]

Boning the bodice

Having got your toile, used it to cut out your heavy material [canvas/linen] you need to sew the 2 fronts together and the 2 backs together along the bottom but not sides shoulder straps or top. sew along your marked chalk lines. pin enough together elsewhere so it is smooth and flat [and iron :) ]
You now want to look at your boning. mark out on the material [in chalk if it will be visible, biro or anything if you are covering over the top] the pattern for your boning – mine has some boning at the back – please see – and the entire front. the boning is vertical at the front and diagonal from top of sides going down towards the middle and reaching the bottom edge pretty much in a line down from nipple. Have a good look at the pics to see what I mean [if you aren't using someone knowledgeable to help you, are you sure of this? as an utter novice I would have really struggled to do this from notes or pics] . look at what you are boning with. I was given flat oval reed to use of just under 1cm width. Therefore I made channels of 1cm width with sewing machining [open at the top] in the direction of my markings

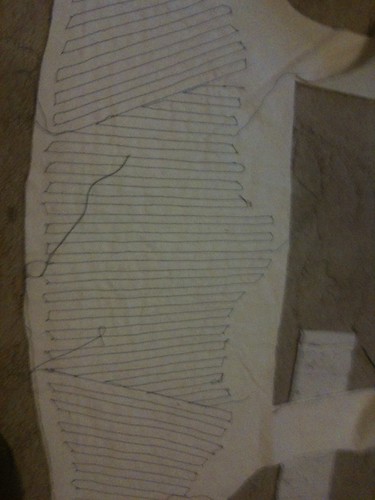
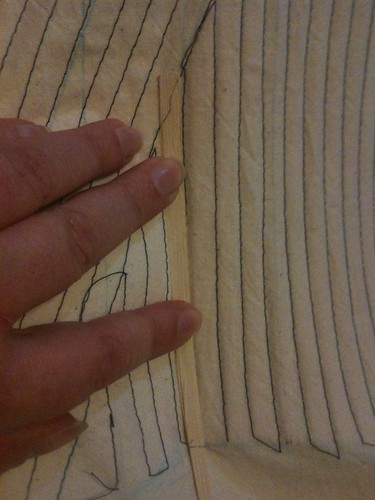
The pictures above show sewing the channels, and also what my front and back look like. The next step is to take your bendal of flat oval reed, and cut to shape so slide a bit down each channel. then sew along the top to hold them in place. Iam not sure whether it matters which way the reed faces, or even if flat reed would be as good – probably – but i had the flat side facing in. below is measuring the reed against the channel.
Finishing the bodice with canvas

nearly there :) now pin your linen covering onto the canvas reeded part. you need to pin both the linen bits on the op – so it goes linen-linen-canvas/canvas . then you sew sides, shoulder strap sides and the top together, leaving the bottom unsewn, and the ends of the shoulder straps. then turn inside out by taking the uppermost linen only – leaving you with linen – canvas/canvas – linen with all the seams etc hidden. the shoulder straps are difficult to turn inside out. so here are the pieces lined up; turned inside out and sewn up

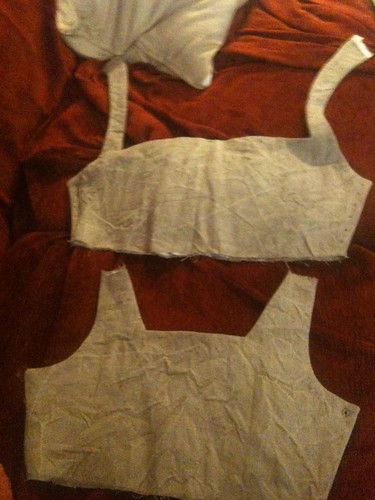
not quite done – eyelets! I might do an eyelet post actually. but in short, you need to sharpen a screwdriver about 1cm diameter into v v sharp point, push this through all the material, and then sew this hole open. My DH made better eyelets than me

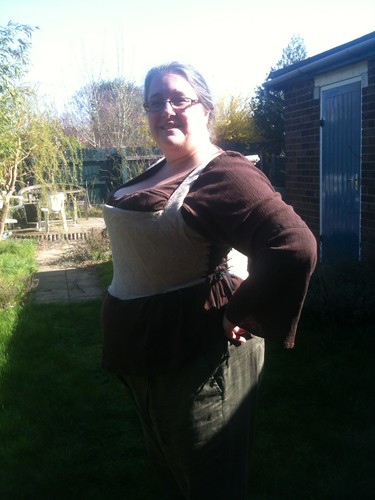
Then try it on, and work out where to sew the shoulder straps together – you can see these are pinned at the back. a line was drawn, the excess bar .5cm cut off, the pieces turned in and sewn shut with whipstitch, and then the 2 pieces sewn tightly together with whipstitch or ladder stitch for each side. Just look how well it supports! It is tight, but actually comfortable – which was a shock to me!
Adding skirt to bodice

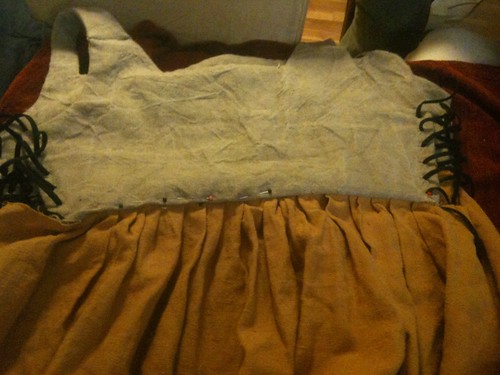
so… like before pin pleats! these are going to be knife pleats, with a smooth panel at the front about a handswidth, and then going out to the sides. You are going to leave 5-10cm on each side free and flapping – this is so you can get it on and off over your head. rather odd looking. then pin the pleats to the bodice so that you pin the good front side of the skirt down against the good back side of the bodice so that you haven’t folded under the bodice and the skirt goes upwards over the bodice.

argh to not taking a pic that is clear of this.[i mght draw a pic, photograph it and add] but the top edge of the skirt is directly on top of the bottom of the bodice. you must make sure that the front linen of the bodice isn’t incorporated. This is so you can easily just sew along the whole thing when pinned with a sewing machine [2ce for luck] and then flip the skirt down so that the skirt and back linen and canvas are all inverted in.

you then fold under the front linen and ladder stitch or whipstitch that into place. These are the photos I took – please link to better ones in comments if you have them. You can see the line of stitching and flipped up skirt material in the top picture, and that I am whipstitching the top down [it is visible so hand sewn] over the top. All the seams will be hidden [antifray] all visible stitches hand sewn. Have a look at my kirtle and jerkin pages too if this doesn’t make sense, tho the photos not v clear there either perhaps.



Finished product

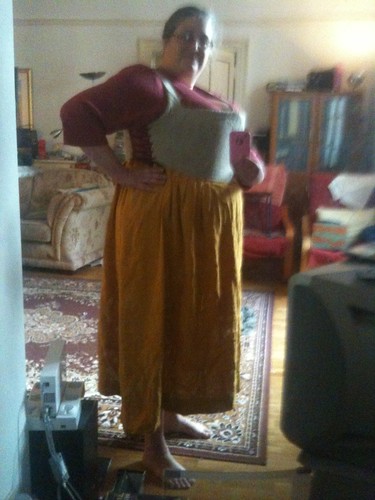
the side flapping bits can be left, or you can use hooks and eyes to make look good, or just tuck under. it works like the placket in version 1 effectively. It is very comfortable and v adjustable.
Making my Kentwell Clothing 1 :- petticoat for my daughter

Kentwell costuming – The Petticoate – Children version

Just remind that for costume making I will be following the tudor costume page fairly slavishly the tudor tailor book and nearer the time costume elves [!] for the difficult bits I am currently not a re-enactor, but have visited Kentwell [see preamble] and we are really keen as a family to join the tudors. I plan to make a shift and petticoat for each of us girls, a shift for DH by Xmas, and 2 shifts each before the first open day in feb [ie majority of linens, at my own risk as may well not be accepted] this is because there is a huge amount of sewing to be done, and i think if you are any more than 2, to try and fit it all in after acceptance is really a tall order and hard work.

This means that the steps detailed here are not originating from my brain, but the tudor costume makers, though some of the mistakes and how to avoid unfortunately did :blush: . The tudor costume page has unfortunately got some non-working links, and since it was last updated a fair while ago there are a few non-completed bits. This wasn’t a problem for petticoates though. Nothing detailed here seems particularly at odds with costume notes from a prev year.

Anyone thinking of making clothes for re-enactment, please check with your group the ‘rules’ on materials, colours and look. different tudor years have different styles – tho less so for poor, especially poor kids. following these notes does not guarentee acceptance of clothing by Kentwell or any other group, but may help a total novice such as myself. I had never made any clothes before these – a hint of my novicitude. I wrote this initially in Sept 2011, but have added in the things that had I had known I would have done differently – mostly in italics :)

The Materials:

I have used a drabbish blue 100% pure linen shirting material. I have used cotton thread though, even if linen more authentic in a near matching greyish colour. I washed it and dried it as recommended

*it has to be said, that there isn’t necessarily huge evidence for coloured linen petticoats in a lot of tudor texts, there is definitely evidence for lighter red wool ones tho, and red is a good colour for a petticoat. If making in advance and playing safe, an unbleached linen or red wool, and then you can dye the linen if it is deemed acceptable by the kentwell year you go to, or by the tudor group you join. Also, that this prob should have a bodice on it. so it prob is a half kirtle in linen – yes, the terminology for me still goes above my head :) however, currently a petticoat/half kirtle call it what you will in coloured linen is acceptable for kentwell as an underlayer. It is not essential but useful so you can lift up your woolen kirtle so it doesnt get covered in mud*

The Disclaimer[s]:

the only bit of clothing i have ever otherwise made is a victorian pinny last year with sewing machine. I am a complete novice with any kind of stitching at all. I find it near impossible to follow a pattern and have a strong allergy to straight lines, accurately measuring and cutting and all those other things that make successful dressmakers. I have never been to Kentwell as a re-enactor, so my attempts are as yet unapproved at costume check! ie follow my lead at your peril ;)

Having said that, the Tudor costume appears to have had all her designs accepted at Kentwell, so I am hopeful. So, opening the page to petticoats

[clearly I did pass costume check :) . but what i would now like to add having done Kentwell, is that really really reinforce the sewing to the waistband, if hand sewing double the thread, if machine go over twice! and for your childr make no longer than midcalf for they will always be treading on it. if you are aiming for room to grow, have a small hem, but 4-5 inches above do a tuck of about 2-3 inches of material ]

Measuring Up:

I read the rectangle bit and thought hmmm so what does that mean in terms of widths and lengths for a child then? my material was 50inches wide and my child 23inches all round and 36 inches to just above ankle. so I decided to go for the version where it says have 2 rectangles so they were each 50 inches wide and 40 inches long – ie a multiplication factor of 4 of the waist measurement. *I think this is quite generous now, and think you could prob get away with a x2.5 -3 facto with a maximum of 1m each.*

So having made that decision for SB, I decided to do the version at the bottom of the tudor costume page which allows for pregnancy etc. obviously at 10 this isn’t n issue [phew!] but did want to factor in some growth.


Cutting and Hemming the Rectangles:

I didn’t cut the straightest of lines, but hemming made the rectangles pretty acceptable standard, and they did appear to be of similar length and width also – always a relief! I did decide to handstitch all, and go with the suggested option of hemming the seams and then whipstitching later, though a bit tempted by run and fell for the imaginative title of a stitch :) . *hemming and whipstitching a good option – it allows you to add panels easily later, but the hemming keeps the linen edge ‘hidden’ and as it loves fraying, this is a good thing :) this is called a finished seam I believe*

Proudly looking at my completely hemmed rectangles I re-read the instructions and realised that it hasn’t mentioned hemming yet. So, to do again, I would still hem at this point, but the short sides only :) Definitely do not hem what will be the top. Although nice and neat, think that the waistband is now fairly bulky due to all the material stuffed in it. Oh, I think i forgot to say in the disclaimers that I also have an aversion to undoing and redoing unless absolutely have to. I have decided this top hem is ‘spare length for the future’ though imagine i will never unpick it! A further band round the bottom would be easier. *and actually in keeping with period – TBH placket a good idea for waist stretching, but really don’t be bothered about length for the future – tudors not into big hems as materials cost money, and the skirt can get shorter over the year, and eventually put a band around the bottom *
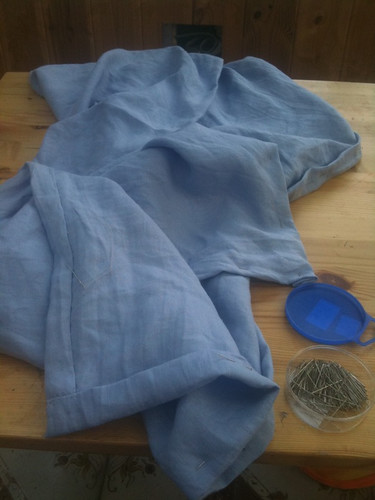
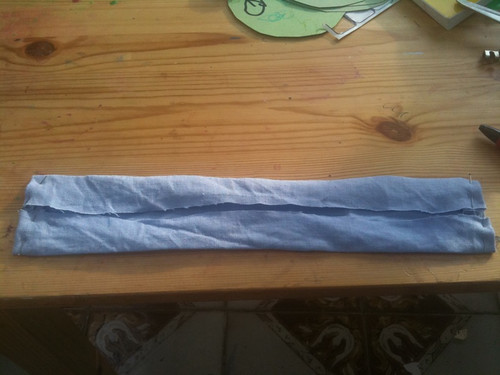
Preparing the Waistband:

i did actually measure this a lot more carefully! I have 2 waistband halves: the front and the back. each was measured out at 14 inches by 4 inches, with the plan to have a 12 inch by 1 inch band at the end. however, having prepared one, I thought that I would make the other so it was 13 by 1 inch to give a bit more breathing room after putting the 2 12 inch ones around sb. SInce i had included plenty of hem allowance in the cutting, this was very easy. [the costume notes suggest making your waistband 5” longer, i am not sure why? or is it to waistband the placket? I didn’t anyway, and it seems to have worked nicely.

I did all the folds as in the tudor costume page, and then had a crisis and couldn’t overcome my natural disinclination to use an iron. Linen seems to fold well anyway. I did, however, mark the pleats with pen as that seemed very sensible. Due to the voluminous amount of material [hence suggesting a x3 multiplier is more than adequate, and in truth a max of 2m all round] i spaced the pleats at 2cm.

first thing to make - petticoat dd1

Pinning the Pleats:

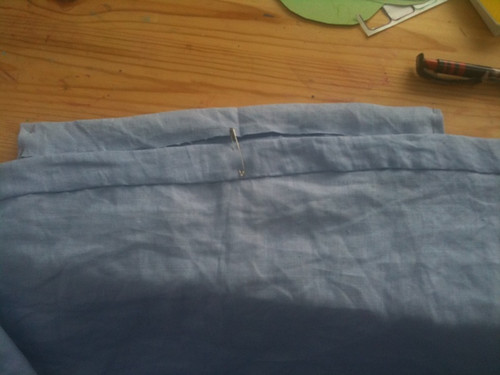
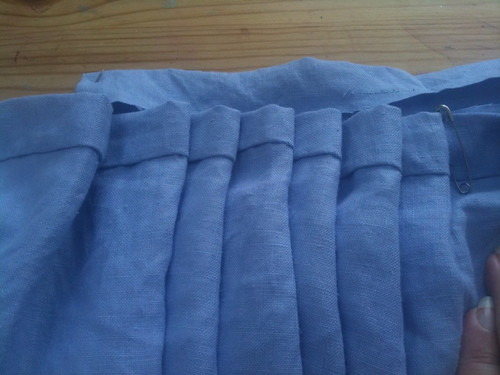
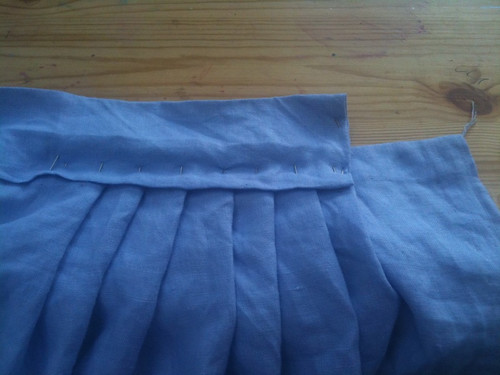
You can see in the picture above I safety pinned for reference the centre of my waistband and the centre of the skirt together before starting pinning so all was even. I had knife pleats going away from a central point and each pleat went back to the previous one before going ahead the next 2cm ie 4cm forwards and 2cm back, 4 cm forwards etc to space at 2cm. this left me with 3inches of free material on each side of the front 12 inch waistband, which are the plackets for the extendible nature of the petticoate. For the rear 13 inch waistband I did some minor bodging so that it fitted. Tudor petticoats at this time have a central unpleated section at the front and knife pleat all the way around to the back, where they meet as a box pleat.

When I pinned these down, I pinned both the forward turn of the pleat and also the backwards return. please have all your pinheads to the upper rather than heads down. It will make it a lot easier to remove them after stitching!

I then looked critically at both bits, decided I was happy, draped them round a v complaining SB even tho pins were outside as it did look scary [30 pins in each bit] and made sure that it seemed a nice tight fit as since it has extension room, didn’t want it to start too loose! Realised this style accentuates her slimness and felt a pang of jealousy [must do better at diet] . You can see the will-be-placket in one of the pictures


Sewing the Skirt to the Waistband:

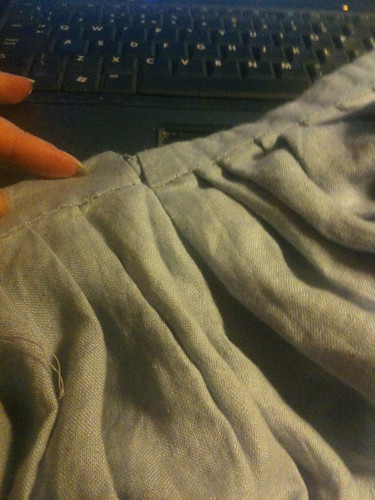
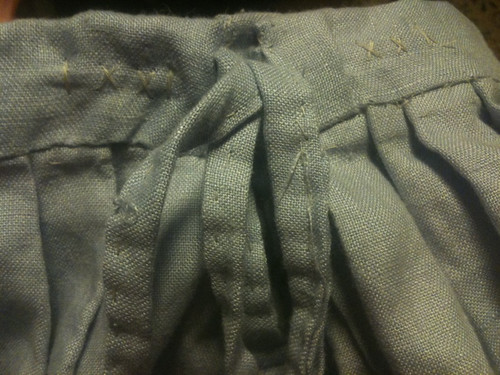
I have to say that here I am not entirely sure I have followed instructions. i have hemmed the waistband onto the pleats on the outside as I think it suggests, and then decided just to hem the other side might be a bit weak, especially for a child who will run and trip up etc. SO after hemming the good side, on turning back over I did a running stitch between the pleats and the fold up of the waistband, so invisible from the outside, but hopefully a bit of extra strength.

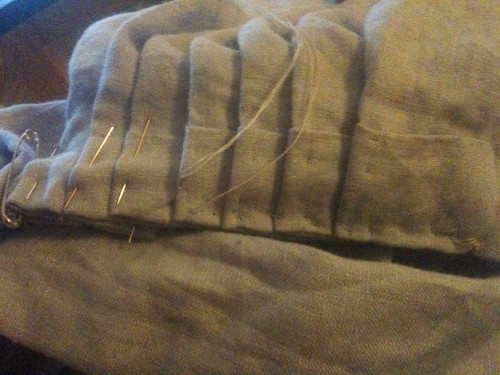
I removed all the pins – including those lost in the folds because their heads were down – ouch – and hemmed the inside view waistband to pleats. It does look v neat and good [for me] and I am pleased. The waistband is chunky though, due to the unfortuate hemming of all sides thing. Might not be a bad thing though, as won’t ruckle up so much. ou cans see the thickness and the sewing through in one of the pictures.


    Whipstitching the Sides:

This was a nice easy job. from the internet it looks like whipstitching is the same as in patchwork, so that is what i have done all up both seams to the very top, so the placket on each side – which is effectively straight rather than placket shaped ;) – is joining the front and the back. It has 3 inches expansion and SB could easily slip over her hips [and when she can’t i will just free the placket from the back…

i would have been delighted except… it is about 1.5 inches from being a snug waist fit :( ie that extra inch wasn’t required. Ho Hum. She has a 6 month to grow before trying it on for real, so maybe will need some of that inch. The length is just right for now, as she is bound to have a couple more inches of height.


you can see the placket open and closed above

    Making the Linen Ties:

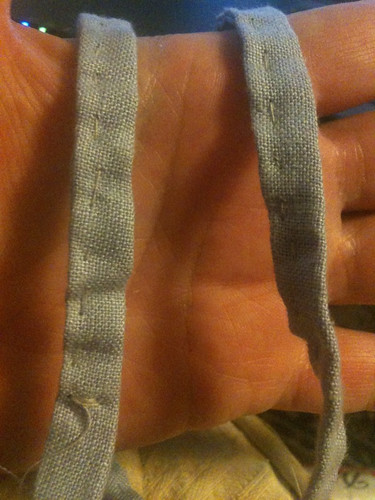
I decided i would have them 1cm wide so cut 2 inches wide and the length of the waistband long. Initially I did it as per the tudor Costume, sewed inside out and attempted a pull through, it did fine till half way when my thread snapped.

I decided to bail out, and did the fold as per waistband [fold each edge into the middle] and did a neat running stitch all along. I think it looks fine . I have then sewed them onto the waistband, recessed along by 3 inches, and since these stitches would be visible, decided to make them v slightly decorative. I think it looks good, will hopefully hold firm, and will scrunch up the sides perhaps 1/2 inch each side, so take most of the spare out. Very happy with the end result. SOme of the seams etc could have been neater, I have definately learnt from the process so the next should be benefitting from this. Alternativeoy, a hook and eye fastening is fine.


What it needs now is a bit of a tidy and neaten job in a few places, and a try on by SB, and then I would iron it and put it away if i was an ironer. Instead I will hang it in the wardrobe and move onto the next petticoat. But, as the first item of clothing I have ever sewn, I am inordinately proud of myself :)

Kentwell Tudor Reenactment – the start of the process!

Kentwell costuming – The preamble

This post was originally written in Sept 2011, but i am rewriting it as now about to start kentwell, so will make it ‘public’ and it may well help others planning for the process, or any other renenctment

Eek! we have decided to apply to become Tudors next year at the grand re-enactment at Kentwell Hall . Various reasons. Firstly educational – the girls will be approaching tudors in our story of the world chronological history at that time, and it will certainly add another dimension to their history knowledge. Tudor life itself is not so different to that in the earlier mediaeval times, particularly for the general workers – which we shall be :) Secondly, we think we will enjoy it. Well, I hope so! We went to the Michaelmas fair yesterday and the girls were v enthusiastic about joining in, even BB, as long as she can be with me.

So… currently BB fancies dairy [so that will be my first choice too then, luckilly should be fine!] and we have agreed alternatives of dyeing station and cotte.

SB most loved the still room, but i think she has to be older, and also liked weaving the corn dollies, so maybe basket weaving. she also would be happy with chopping and preparing food, so cotte there would be ok. may look for a wooden recorder that although not period might slip in as ok.

DH thinks he would be suited to an alchemist. Not sure how many openings for that!!

The big issue is costume making, and for that I will be following the tudor costume page fairly slavishly and begging advise from k at deependers and nearer the time costume elves!! [hoping to not only be accepted then, but pass the nod by the costume elves - scary :) ]

other useful books

In the end, BB and I are in the cotte, SB went for a first choice as a peddlar, and DH is a woodsman

Jubilee Weekend

Hmm, having not blogged much for a long time, i am dreadfully out of the habit of sitting here and blogging in the evening. Mostly, I am doing work now not sewing so much!

We had a fantastic jubilee weekend with friends, camping in their parents backgarden – poor parents! they were great hosts, I wonder if they truly knew what to expect? we were first to arrive and pitched our tiny tent, helped sort out a few things and then just enjoyed people arriving. Lots of friends, lots of adults chatting, lots of kids playing. A fair bit of sewing :) I hope the twins enjoyed their birthday. I certainly did :) SB slept with the birthday girls in their bell tent – tho sleep might be too strong a word, as i think she and another girl decided to read their whole books… BB – who had had a fab time playing with her friend J – was fine with SB not sleeping with her, and after her story, fine for me to go and rejoin adults – albeit only 5m away – but a big step in confidence for her. I also loved how she had brought sleeping bags for tigger and yoshi :)

The following day, tho the weather on the dire side, we went to the oyster faire. no crowds meant an excellent view of mummers, falconry and storytelling. thought the mummers great actually :) also various tudor dances and sounds about the place. lots of opportunity to look in reenactment tents and buy stuff – points for DH, suhat for SB. SB and some of her friends went dressed for the occassion too, and looked fab. BB bought herself an axe ;) and SB a tiara – my girls, not from the same pod!

We went back to clear away tent and chat some more before leaving rather late. good weekend tho :)

I had both bank hols of work – woohoo! so spent it with girls, doing some catch up on gardening, playing games, crafting, reading and exhorting a bit of home ed ‘normals’, oh and loads of clarinet practice :) . SB and I made elderflower cordial – which smells divine. i had another go at making a mediaeval pie with BB [she still didn't like it!]. lovely pottery days :)


tutdor/mediaeval veg pies

weds was also off work – lucky me, and we made it a jubilee themed musicetc. I brought crafts to make jubilee inspired banners and also a patriotic cushion. music lessons, french games, music theory also done.

bb jubilee bunting
sb jubilee bunting
bb jubilee cushion

this weekend we meant to do a bit of activity and geocaching, but for the first time in ages migraine free :) :) so celebrated by doing nothing! [well, clarinet prac, tidying up the kentwell stuff and making sure we had all i thought we had ;) ] enabling the girls to get started on crafts for village country faire as it is next weekend. BB is going for the scattergun approach – hundreds of quickly dashed off entries! we have tried to make sweets from elderflower cordial, but think i burnt the sugar – might need to try again ;) we have made olympic medals, golden temples and pictures. also played more games and had lots of snuggles and i read to them about Henry 5

Atypical Day Photoblog 2012

In blogging this, I have realised that with the upgrade, all our blog pages on the side seem to have disappeared :( as do lots of photos from the blog. hmm!! Every year in May since 2005 I have blogged a home ed day. This was last years. Here is this year’s home ed day. It is not at all typical as I am not the main home educator, and perhaps not the home educator at all. Over the last 2 years I have had too many balls to juggle, and I have thrown some hard at greenhouses, and others have slipped through my grasp tho still precious to me. Home education is one of the things I have let slip :( . Wednesday is still my home ed day though, and nearly every wednesday we go out to someone elses house, be it WedEd at Zoes or Music at Ginas or once a month History at mine. Today should have been WedEd, but i notified in advance a duvet day was needed, as working the weekend either side I felt i needed a connect day with the kids. So we were atypically at home. Also not a typical day, because many days they are out. this week Tues they were at a museum event, Thurs they are at a circus skills taster, fri is ‘the wild place’ so actually spending a whole day at home is unusual. What is usual, is that I only thought of doing it part way through the day, so the number of photos are a bit sparse!

We were all up by 9am as BB had a haircut. SHe has been hating brushing her hair or having it brushed, so she went out for a cut. When she came back we got going. Typically I was migrainous, so took tablets and attempted to recover. Our plan was to do a fair bit of bookwork in the morning, as so much of the week was out-and-about-ing, and then cook mediaeval pies in the afternoon, in preparation for Kentwell.

BB, therefore, started with painting :) . She had a paint by numbers kit of superheroes, and used her art easel [that was a good buy!] to steady it before doing the painting. SB started with clarinet prac for her grade 3 [no photo!]

Both then did a morning of bookwork things and we sat in the conservatory, which was just perfect ;) . BB said she planned to complete explode the code book 2, but after 4 pages declared that after all she wasn’t :) , SB has nearly finished Singapore Maths My Pals are Here 5A. BB then did some spelling and took down a dictated sentence. we had a bit of a disagreement that her ‘d’ looked to me like ‘p’ tho she said they were ‘D’ – leading me to read about hot-pogs. She then went outside to make things in her den and bounce on the trampoline. SB did a section of Galore Park science 1 on heat conduction, and then Galore Park English 1 . I hemmed my kirtle so a bit shorter and then poured walnut oil on our Kentwell wooden bowls to season them in the hope that they don’t crack when we use them. She finished her Rome Dk project book and joined bb outside whilst I sorted lunch.


Lunch had, we went outside and the girls swung, bounced and made dens and then we had a go at making our mediaeval pie. I planned to make one savoury and one sweet, but both insisted that they wanted to make an apple pie! so we made 2 apple pies :roll: . We followed a recipe for hot dough pastry tho we used wholemeal flour – to try and get used to it really, as we do prefer white flour pastry. It was straightforward to make, and that recipe made 2 good size pies. we sweated the apple with sugar and cinnamon before putting in the pie, but not sure how sweet the pies will be [or edible]. with the spare pastry the girks made a jam tart each.


Back out in the garden SB and I took turns reading a chapter of story of the world 2 – we are a long way behind where we should be for historyetc! BB listened and fished and went in her den. SB also bounced and ate pomegranate. Then there was a fair bit of bouncing :) whilst I sorted out some of our seedlings in the greenhouse.


Time for a final bit of bookwork outside. SB did some of her collins grammar, and BB did some singapore maths 1B, and then made a maths game to practice tens and units. we have gone back a step as realised she was struggling with HTU. more bouncing ;) . I made some wool little bags out of scraps.


finally BB went to judo for her grading – here she is in her white belt for the last time. SB is being graded as I type, fingers crossed, as we had thought her grading was next week, but it has been brought forward and she hasn’t practiced her patterns :(

Phew :) SB passed grading :) so we are watching star wars .

books used today:

i have an affiliate link, and any order thro a click garners me pennies ;)

month of may

i think may is my favourite month. i love the smell of mayblossom early on and then the elderflower. only mayblossom out at the moment, but this year there are that many fields of rape that the smell of them is overpowering. I do wonder whether that is why i have had a migraine nearly solidly for 2 weeks.

mayblossom reminds me of my childhood. my school playing field was surrounded by a hedge of them, and also some hawthorns making a dingly dell to play games in. It reminds me of little nanny, whose birthday was may first. it smells of the promise of summer, and the need to be getting those summer seeds going of squash, sweetcorn and climbing bean.

I love the smell of the mayblossom

a general catchup

I am sad not to have posted blogs for the last 2+ months, as you forget bits, and somethings never get captured that you would have liked to say. so i am going to randomly say things!

We had a great holiday in wales, near newgale in a cottage just a step or 2 from the beach. we relaxed, had fun as a family and enoyed each others company. I remembered thinking i should blog about the joy of having bb’s hand in mine, walking along the coastal path and then the road [as she got irritated by the flies!] as she told me all the things that were catching her imagination or wanted to know more about. the joy of rock pooling with sb and bb, finding shells, stones, crabs and just picking about. letting them set the pace, and what to do. dreamers all 3 of us! playing board games with sb, laughing and beinghappy together, or jointly eyerolling at bb :) feeling proud of my girl reaching the cusp of teenagerdom, walking towards womanhood andd being v lovely. Also having time to talk with my husband, board games and just remembering why he is the perfect man to have married. we also got to meet the portico parents – v lovely, and sb quite taken by gaffers programmes. I also got opportunity to sit and let thoughts flutter around my head. It has been v v hard losing my sister, as well as losing little nanny, and i have been finding it all much harder again recently.

we went to the big bang science fair in brum – fab! staying at a travelodge with friends fairly centrally. we got the most from the science fair, both girls being enthusiastic, interactive and gaining alot from it. we also visited a museum in the jewellry quarter which was fab. we also had a shopping day, where i enjoyed spoiling the girls :)

otherwise, home ed has been carrying on, we have had history days, weded days and extra days out

BB has got more confident in reading, and is really keen on drawing and planning out designs – particularly for rockets. she is keen on space things currently. she has become happy to be left at judo and gym – big deal for her :) .

sb has passed her piano grade 2, and working on clarinet, home ed is ticking along, and she has read everybook we possess that is suitable for her! she is definately showing us the teen she is going to be , much more confident about who she is and what she likes, a real pleasure.

we have done a fair few family things – a family party for my side of the family at easter, celebrating my cousins pregnancy – woohoo – and missing those family members who are no longer with us, and celebrating dh’s parents golden wedding with his family. cross over of the families at each party, as with all these years, we really are one. v happy to see those we love x

and obv my work doesn’t get anyless stressful.

there we go, a catch up! i guess i have missed out loads!

This is why I have been so quiet

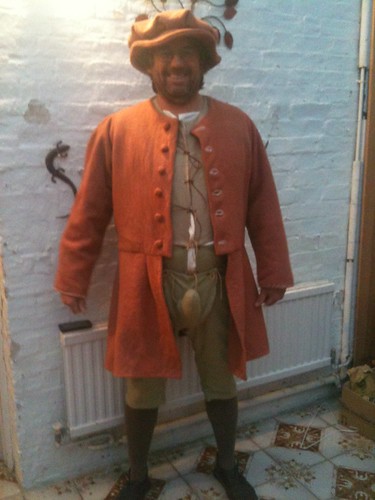
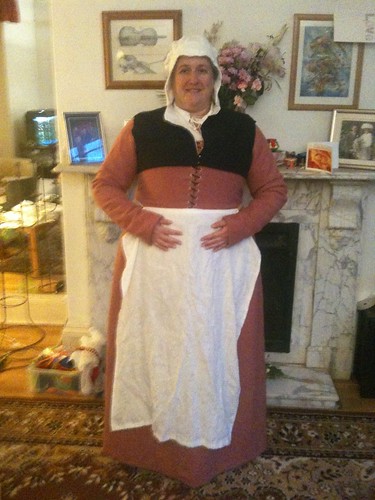
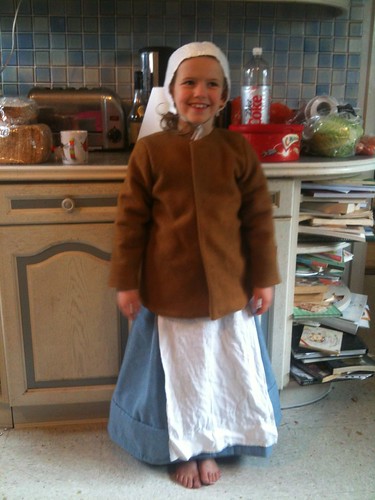
All my time not interacting with kids, or being at work has been taken up by sewing. I have made pretty much all by myself [with a bit of help here and there to get tricky bits cut or sewn right], pretty much by hand, and pretty much in authentic wool and linen, 4 complete costumes for us to be tudors and take part in the annual recreation at Kentwell Hall.

sign off for DH
me for sign off
DD1
DD2

I am VERY proud of myself :)

going back over the last fortnight

and speedily catching up!

Home ed
usual things really, SB doing a fair bit. struggling with the galore park history syrwtl 1 level of now detail and interrogation, so helped her out a bit, with a mixture of other resources and wikipaedia, think she has got the measure. Also need to sit with her over music theory. otherwise she is independantly cracking on, and we review bits and pieces. Reading loads and loads, as always. Also practicing well for her piano grade 3 that is coming up, and clarinet, as her teacher suggests she might do grade 3 next term. BB is reading lots of apple tree farm books now. Definitely getting the hang of this :), and she is also doing lots of careful crafting, drawing and sewing.

we had another great wodensmeet, continuing on with the real science for kids physics, this time investigating inertia and momentum with marbles. Preparing a storyline for 3 little pigs animation, and making some fab rabbits and assorted other critters from old socks. other art, chatting etc also went on.

home ed groups – arts award, forest skills etc and usual after school activities – BB is really enjoying judo and doing it without sb now. both got some more badges at gymnastics. sb level2 and bb level 5. SB is loving the spanish element in her ballet class currently and would like to learn to flamenco.

I had d and v for 3 days :( which was a nightmare from a work perspective, not v pleasant, and also stopped us going to an interesting looking CHEF thing on calendars and clocks, that i was told nails would be involved :) it didn’t stop us going to the CHEF science faire, which turned out to be absolutely fabulous and we all really enjoyed. talked to interesting parents and interested children. picked up some experiments to repeat at home and had a great time. Thankyou :)

we had a musicetc, where i repeated one of the science faire experiments and we talked about surface tension, also some latin was done and practical music. i almost failed to leave in time for my sewing fest with a lady with a skill at tudor corsetry, and we spent 10 hours setting the reeds into the bodies. hoping the next sessions go more swiftly!!

my parents came for the weekend, and lovely to see them. particularly as dad getting over a big op – nephrectomy for cancer. we now have the histology, and completely removed, so we can all breathe more easily :) we didn;t know when he came up, so a bit stressful. this may have been another impediment to blogging.

oh, and we have played lots of board games, in particular carcasonne and forbidden island. BB is getting to be a good game player too :) . I think this will do for a catch up :)